Utilize a Swift Package inside a Swift Playground
New in Swift 5.3 is the ability to embed and use resources (plists, images, xibs, etc..) inside a Swift Package. Additionally Xcode 12 affords us the ability to drag packages into a playground and utilize them. In this tutorial we leverage both of these new features to build a Swift Package that encompasses a GUI and then present that GUI within a Swift Playground.
Part 1: Building a Storyboard GUI in a Swift Package
Create a new Swift Package  with Xcode
- In Xcode File->New->Swift Package.
- In the Save As text box, name the project something. In this example I name my package MyExampleGUI
-
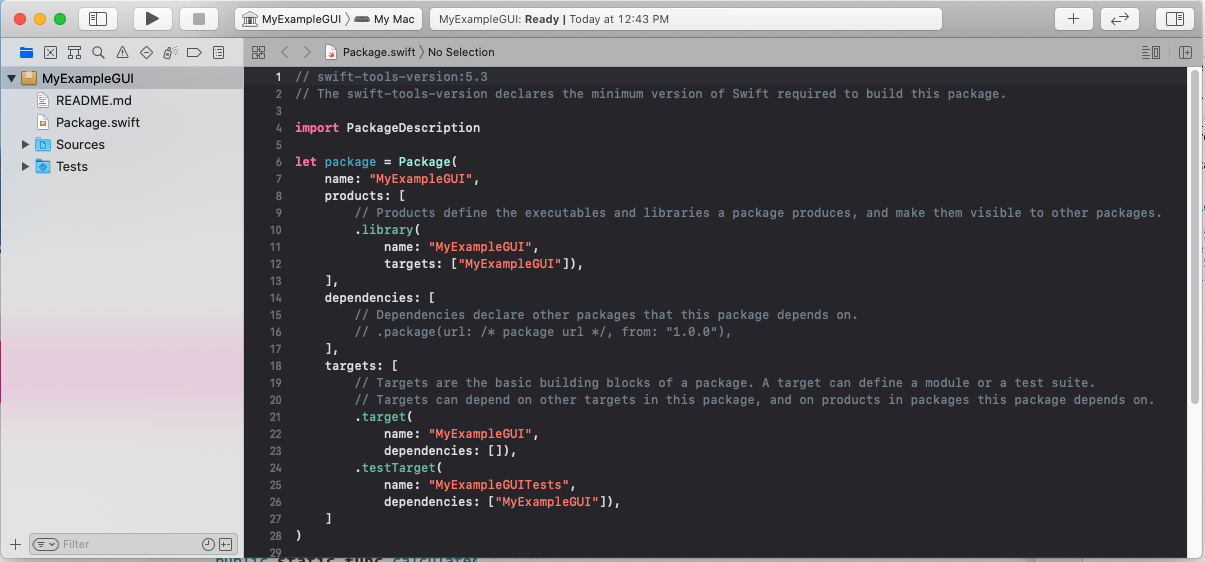
Xcode will build a skeleton package that looks something like below:
-
Update the Package.swift so that iOS 13 (or whatever version makes sense) is required. Note the addition of the
platformsfield.// swift-tools-version:5.3 // The swift-tools-version declares the minimum version of Swift required to build this package. import PackageDescription let package = Package( name: "MyExampleGUI", platforms: [.iOS(.v13)], products: [ .library( name: "MyExampleGUI", targets: ["MyExampleGUI"]), ], dependencies: [ ], targets: [ .target( name: "MyExampleGUI", dependencies: []), .testTarget( name: "MyExampleGUITests", dependencies: ["MyExampleGUI"]), ] ) -
Set the active scheme to an iPhone simulator.

Generate a GUI from our package 
-
Create a new swift file in Sources/MyExampleGUI/ named SimpleFlowViewController.swift. Replace the contents with the following:
import UIKit class SimpleFlowViewController: UIViewController { @IBOutlet var myLabel: UILabel! @IBOutlet var myButton: UIButton! override func viewDidLoad() { super.viewDidLoad() } @IBAction func didTapMyButton(_ sender: Any) { myLabel.text = "did get tapped" } } -
Create a new storyboard file in Sources/MyExampleGUI/ named SimpleFlow.Storyboard. Add a View Controller to the storyboard. Set the Storyboard ID and Class of that View Controller to
SimpleFlowViewController.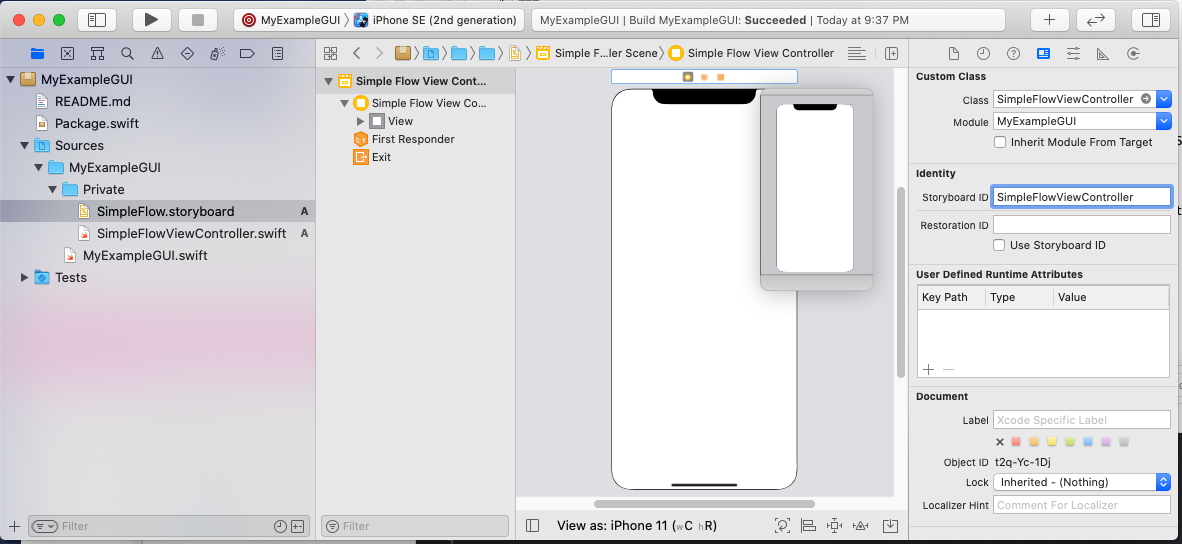
- Update the package manifest to add this new storyboard resource. Package.swift should look similar to the following. Note the additional
resourcesline.// swift-tools-version:5.3 // The swift-tools-version declares the minimum version of Swift required to build this package. import PackageDescription let package = Package( name: "MyExampleGUI", platforms: [.iOS(.v13)], products: [ .library( name: "MyExampleGUI", targets: ["MyExampleGUI"]), ], dependencies: [ ], targets: [ .target( name: "MyExampleGUI", dependencies: [], resources: [.copy("SimpleFlow.storyboard")]), .testTarget( name: "MyExampleGUITests", dependencies: ["MyExampleGUI"]), ] ) -
Add a button and a label to the storyboard.
- Connect the button and label on the storyboard to the outlets in the SimpleFlowViewController.swift code. If you do this from the package, Xcode will crash. To complete this step do the following:
-
Close Xcode and open the terminal. Navigate to the root of the package. Create a project file from the swift package with the following command.
$ swift package generate-xcodeproj generated: ./MyExampleGUI.xcodeproj - Open the newly created MyExampleGUI.xcodeproj. Note: you may have to re-add the storyboard to the project (probably a beta bug).
- Select the Project in the navigator, and then select the build settings. Inside the build settings set the Base SDK to
iOS - Hook the button and label on the storyboard to the code by ctrl dragging to the SimpleFlowViewController.swift IBOutlets. Ctrl drag from the button to the
didTapMyButtonIBAction method as well.
-
- Create a function in MyExampleGUI.swift which returns a SimpleFlowViewController to the caller.
import UIKit public struct MyExampleGUI { public static func fetchViewController() -> UIViewController { let sb = UIStoryboard(name: "SimpleFlow", bundle: Bundle.module) return sb.instantiateViewController(identifier: "SimpleFlowViewController") } } -
Replace the automatically generated code in MyExampleGUITests.swft with the following (or just remove the file).
 import XCTest
 @testable import MyExampleGUI

 final class MyExampleGUITests: XCTestCase {

 }
Part 2: Importing our local Swift Package into a Swift Storyboard
- In Xcode create a new playground File->New->Playground. From the playground template options select Single View.
- In the Save As text box, name the playground something. In this example I named my playground MyPlayground.playground
-
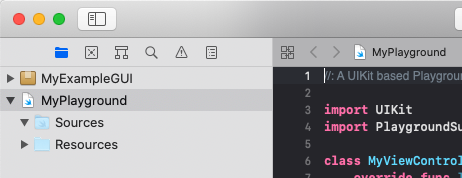
Open up finder, and drag the root folder of your Package into the project navigator. Make sure to place it at the same level as the playground, and not nested within the playground. Note the heiarchy below:
- Save the playground as a workspace. File -> Save as Workspace.
- If it is not already, set the target to MyExampleGUI > Any iOS Device
-
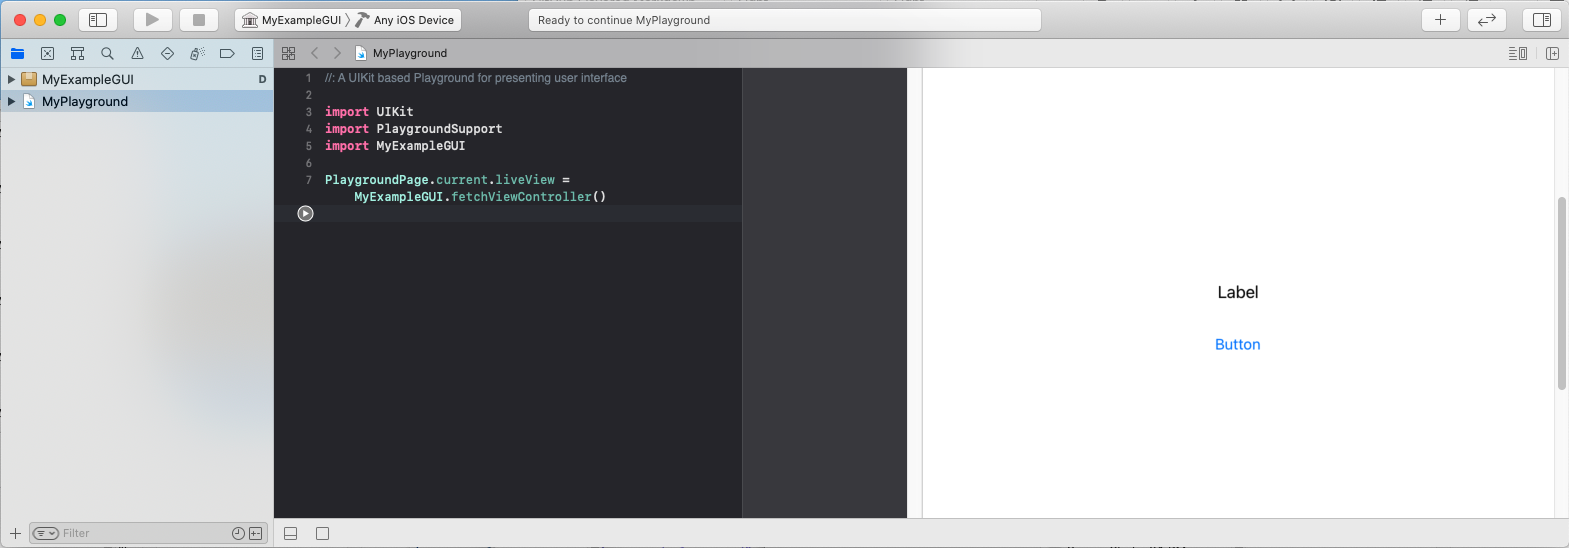
From the project navigator select MyPlayground, and replace the text in the editor with the following:
import UIKit import PlaygroundSupport import MyExampleGUI PlaygroundPage.current.liveView = MyExampleGUI.fetchViewController() -
Run the playground to observe your GUI built inside your swift package being presented in a Swift Playground.
Notes
This is likely not an ideal workflow for developing Swift Packages, as the debugging tools are not functional.